Control & Communicate Switcher changes






Switcher Slack App is a Slack App that can be used to control Switchers from your Slack workspace.
Features included in this app are described below with examples:
Change Request
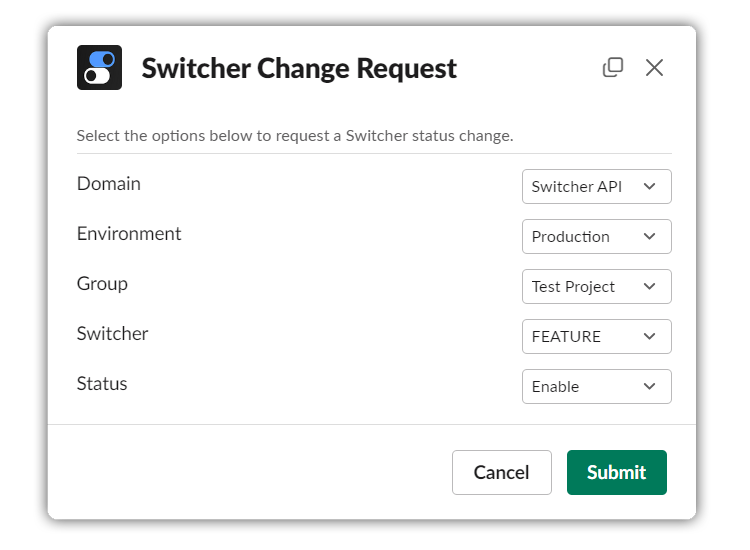
Open change requests selecting the Switcher or Group of Switchers to be changed.
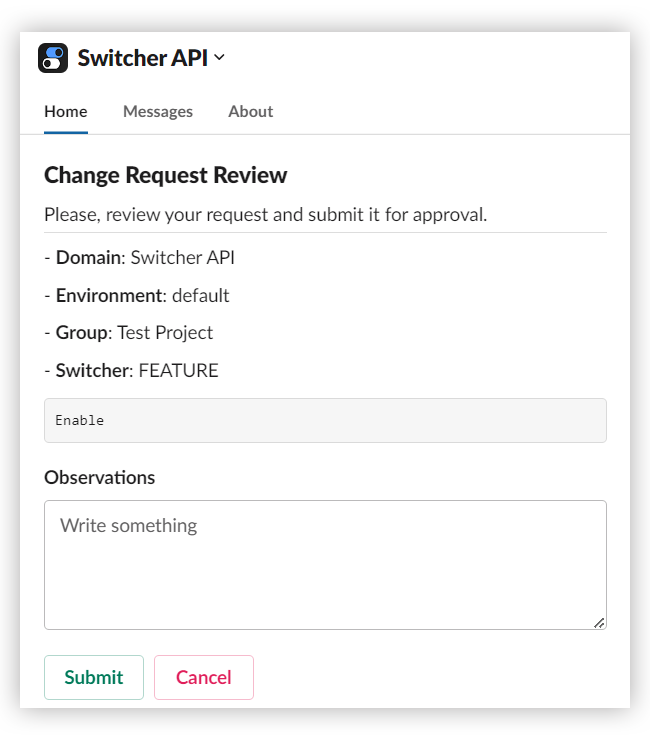
Review your request and add some remarks to justify the change.
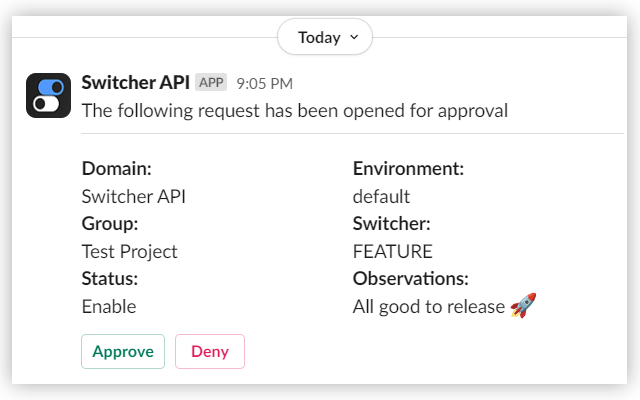
A summary message containing all details about the change will be sent to a specific group that was choosen during the installation of the app.
- Python 3.14
- VirtualEnv -
pip install virtualenv - Pipenv -
pip install pipenv - Ngrok (Slack Apps requires HTTPS endpoint)
The steps below will guide you through the process of creating a Slack App.
Assuming that you have signed up for a Slack account and are logged in to a Workspace.
- Open https://api.slack.com/
- Click on 'Your Apps'
- Hit 'Create an App' and then select 'Blank app'
- Input any App Name (e.g. Switcher API) and select Workspace. Click on 'Create'
- Go to 'Basic Information' and copy 'Client ID', 'Client Secret' and 'Signing Secret'. Launch Switcher Slack App with the copied credentials.
- Open 'switcher-slack-app.yaml' and replace the ENDPOINTS with the app URL e.g. https://switcher-slack-app.ngrok.io
- Copy all the content and paste to the manifest YAML space in the 'App Manifest', then hit 'Save Changes'
- Go to 'Event Subscriptions' and click on 'Retry' to verify the endpoint.
- Click on 'Save Changes'.
(*) Do not install the app via 'Install to Workspace' button
In order to install the app, you will need to run https://[SWITCHER_SLACK_APP_ENDPOINT]/slack/install in your browser.
This will trigger the callback to Switcher Management [SWITCHER_URL] to proceed with the Domain authorization.
- Create a new Virtual Env
- Install dependencies:
make install - Copy the values Client ID, Secret and Signing Secret.
- Create a .env file based on .env.template and paste the copied values.
LOG_LEVELcontrols application and root logger verbosity. Use values such asDEBUG,INFO,WARNING,ERROR, orCRITICAL.
- Make sure that the SWITCHER_JWT_SECRET matches the Switcher API env value for SWITCHER_SLACK_JWT_SECRET
- Make sure that Switcher Management has SWITCHERSLACKAPP_URL set to the app URL
- Start the API by running:
make run
You are more than welcome to contribute to the project. Here are some important guidelines:
- Suggestions: Open a discussion topic or issue and describe clearly what you have in mind.
- Fix: Open an issue if you found a bug.
- Solution: Open a PR in case we agreed upon your change suggestion discussed before.
Below some basics steps that you probably are familiar with when contributing to open source projects.
[Before] Check if all tests are passing:
make install-test
make test
[Chaging] Check if all tests are passing and covers the change being made:
make test
make cover